
Pull-apart cinnamon bread
In my world, cinnamon rolls are the perfect indulgent treat to enjoy in front of the fireplace with a cup of coffee while opening gifts on Christmas morning. Or any and every morning between Christmas and New Year’s for that matter. Sadly, most years I find that making cinnamon rolls falls to the bottom of the list in my frenzied holiday prepping. When my kids were young, monkey bread (the easier and way-distant cousin of cinnamon rolls) was often the Christmas morning treat. At least until the year I caught my mom’s oven on fire baking monkey bread in her angel food tube pan. Who knew that the buttery sugar and cinnamon mixture would slowly leak to the bottom of her oven. (Sorry mom) This year in the spirit of Christmases past, I made Cinnamon Pull-Apart Bread from Sarah Kieffer. This is brilliant. It gives you the satisfaction of a cinnamon roll with the fun of monkey bread.

The best part of Christmas morning.
Pull-apart bread begins on page 154 in Sarah Kieffer’s Baking for the Holidays. The recipe is written for Lemon Pull-Apart Bread (which sounds and looks divine), but it was the cinnamon variation that caught my eye for the holidays. This bread is made even more perfect by baking it in a 9 x 4 x 4 inch Pullman loaf pan, which gives you beautiful straight sides juxtaposed against the curvy pull-apart pieces of dough that spill over the edges while baking.
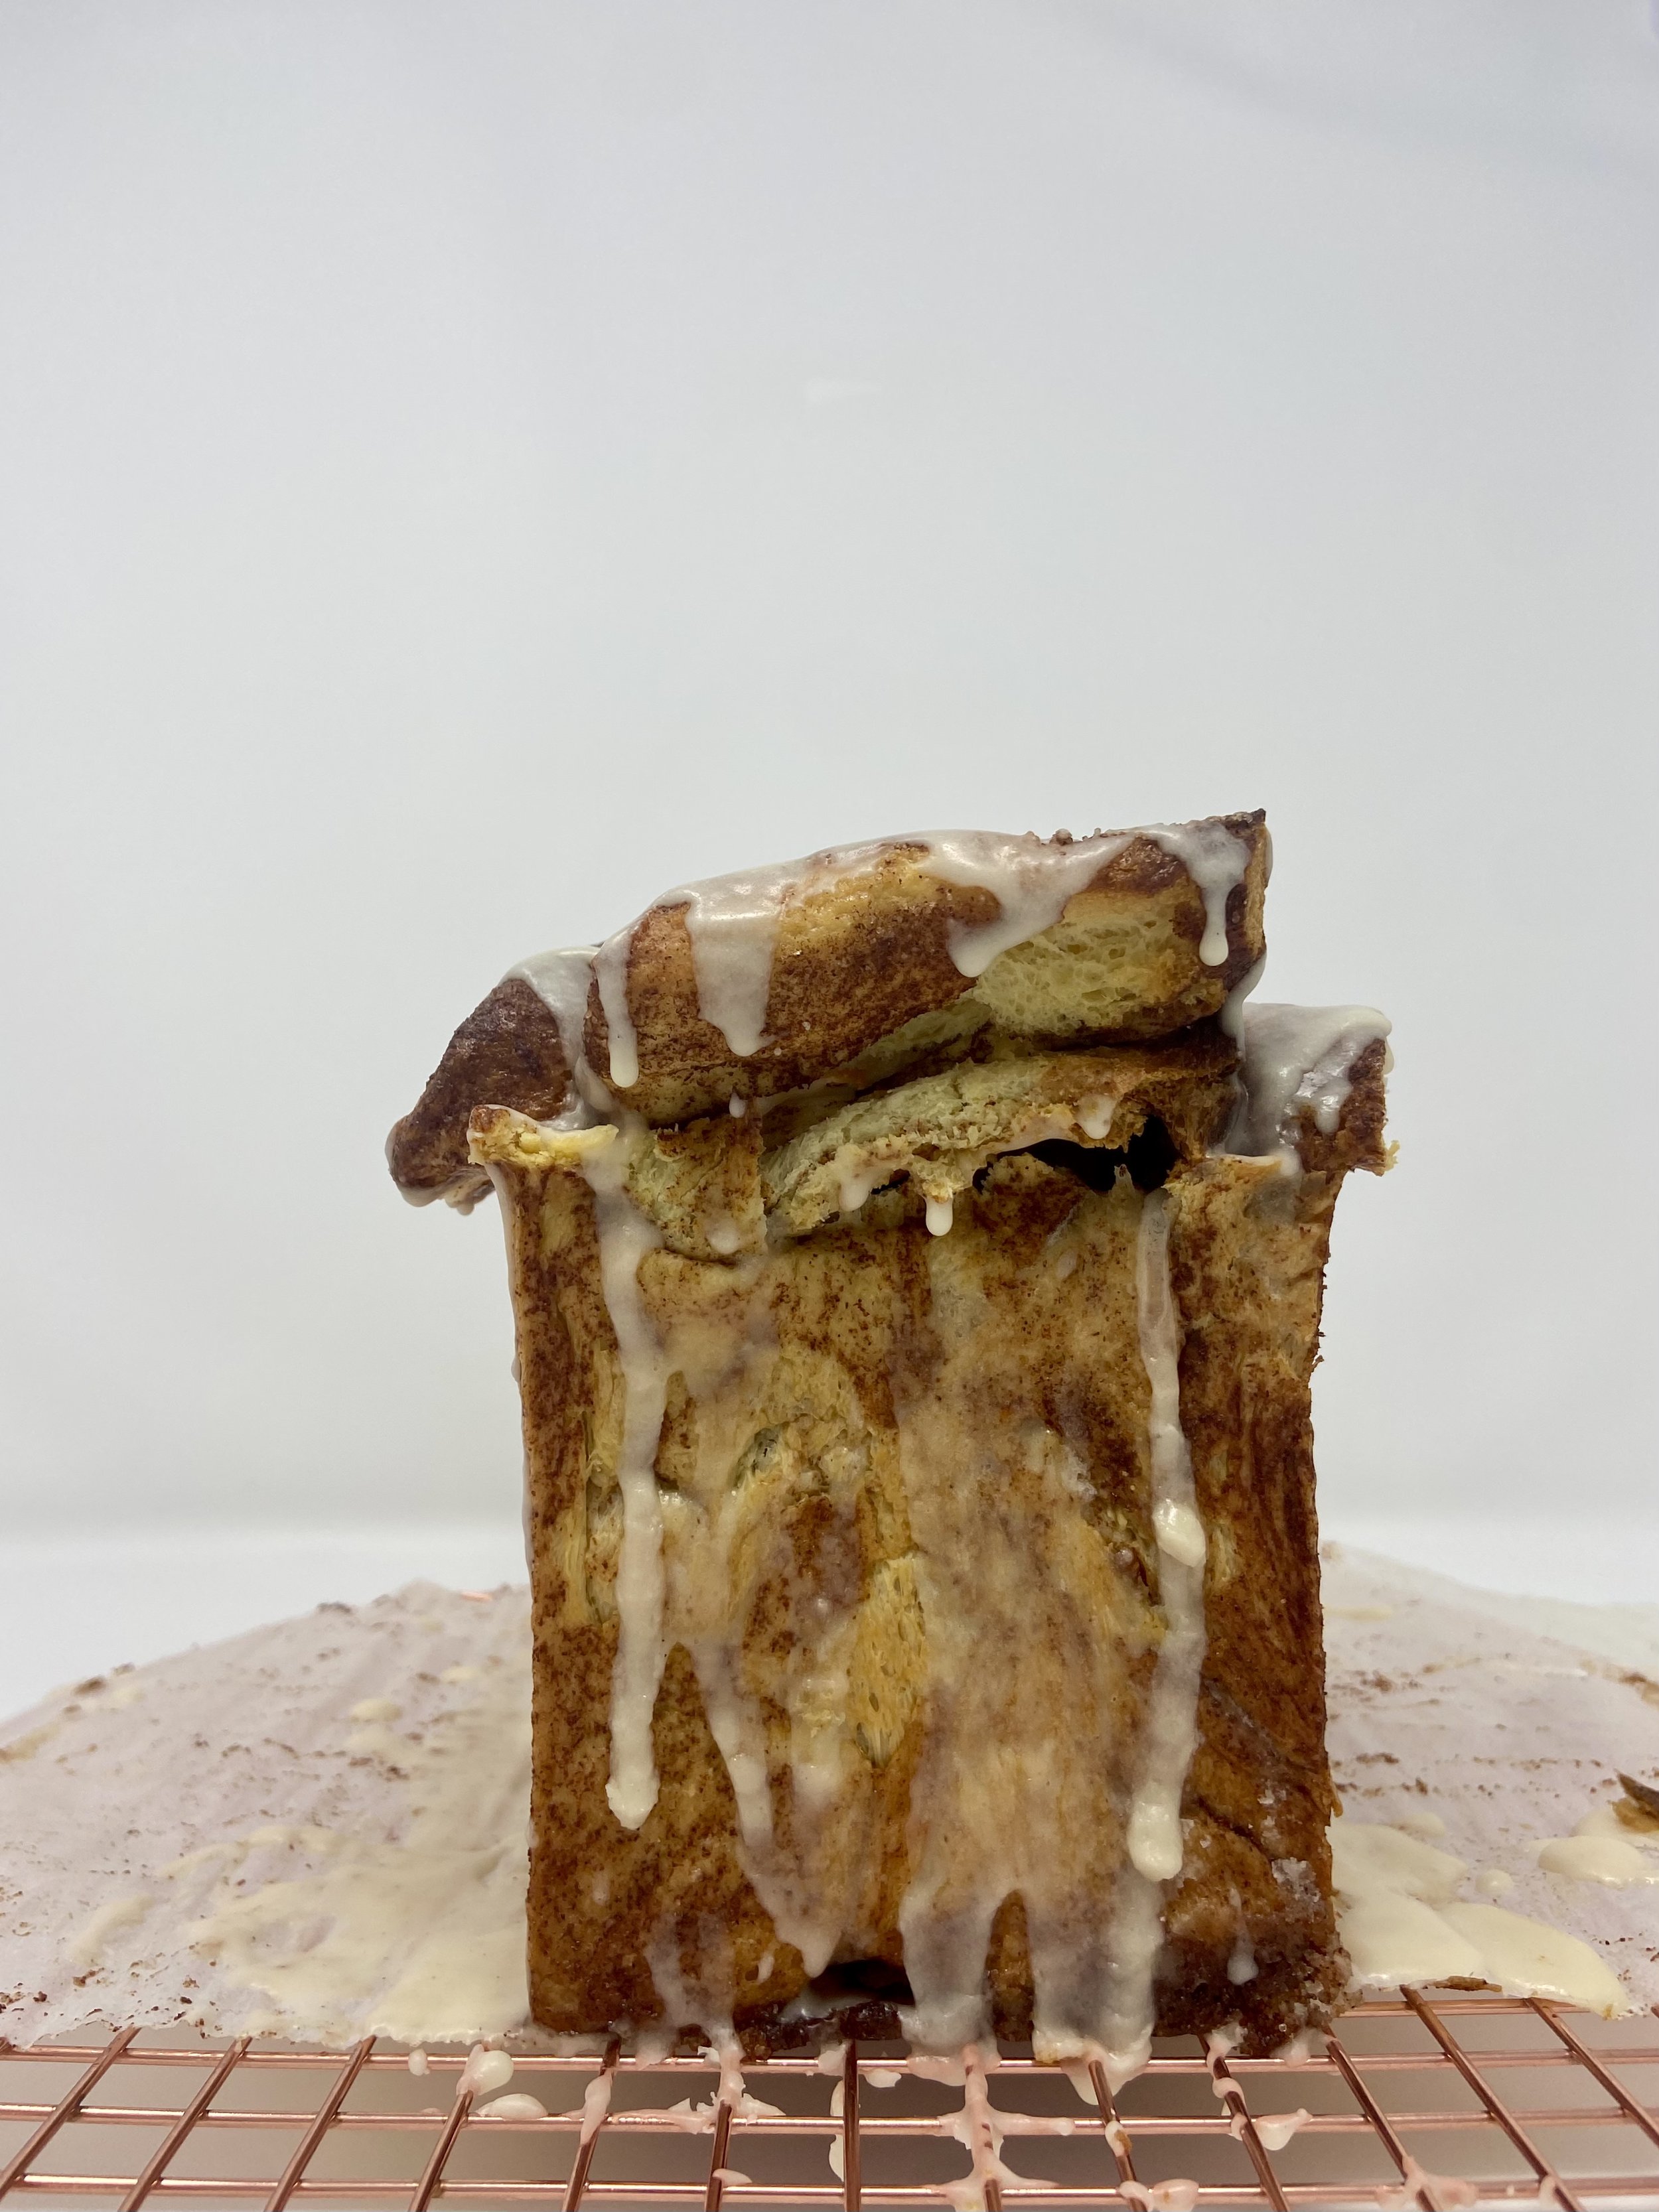
All the angles. See how the edges are super straight from baking in a Pullman pan.
I learned that this pull-apart bread is just as time consuming as cinnamon rolls, but hey, I got to use my new Pullman pan. The bread requires a 30-minute initial rise. Then you’ll need to use your hands to fold the dough over itself towards the center as you turn the bowl (about 6-8 times). Then you cover and let the dough rise 30 minutes. You repeat this exercise three more times for a total of four folds and a two-hour total rise time. After the last fold, cover with plastic wrap and put the bread in the fridge overnight.

Here she is before entering the oven.
The next morning, prep your pan with a sling of parchment paper. Use some butter to grease the pan so the paper sticks. Then roll the dough out into a 20 x12-inch rectangle and cover with melted butter and press the cinnamon and sugar mixture into the butter. Then you cut that into five equal strips (12 x 4-inches). Stack those on top of each other being careful not to lose the cinnamon and sugar. Cut again into six 4 x 2-inch strips. Then you take each stack and place it into the pan sideways, so the cut edges are facing up. You have to squish them in there to get them to all fit. The final step is one more rise of about 45-60 minutes until the bread is doubled in size.
Bake the bread at 350 degrees for 40-50 minutes and sit back and inhale the delicious scent filling your home. The recipe suggests using a thermometer to check the temperature. It’s done at 195 degrees. This worked well.

Another angle.
Important tips:
Place a cookie sheet on the rack below to catch any gooey drippings.
I forgot to do this, but I recommend covering loosely with foil halfway through the baking time so the top doesn’t get overly brown.
Make your icing while the bread is baking so you’ll be ready. IMHO maple frosting is the only way to go. I’ve talked before about my mom’s legendary cinnamon rolls covered in maple frosting. To me, it’s not a cinnamon roll (or cinnamon bread in this case) without maple frosting.
Take the bread out of the oven and place the pan on a wire rack. Immediately pour half the icing over the loaf.
Let the loaf cool for 15 minutes and lift out using the nifty sling you made.
Drizzle the other half of the maple icing over the cake and try not to eat it until it cools slightly.
Naturally this is better warm. But in the interest of sleeping in on Christmas morning, I made this the day before. We warmed it up by pulling off a thick slice for each of us and placing in foil in the toaster oven for 10 minutes. Subsequent mornings I just popped it in the microwave, which also works fine.

Can you smell it? Can you taste that maple frosting drip? My bread fell over the edge of the pan on the ends. I just pushed it back into the pan while it was warm. Hence why you want to make sure you have a pan on the rack below to catch those gooey drips.
My maple icing variation:
1 1/2 cups powdered sugar
1 Tablespoon melted butter
1 teaspoon vanilla extract
1 teaspoon maple extract
2 Tablespoons water
Maple syrup as desired
Whisk ingredients together in a small bowl. I started with 2 tablespoons water and added real maple syrup to thin it to the desired consistency. Don’t even think about adding nuts or raisins.
Go directly to your kitchen and make this for New Year’s Day. Or any day this year.
Happy New Year!
P.S. If you don’t have the Baking for the Holidays book, you can order from link above or via my book shop on my website. If you can’t wait for the recipe, send me a note and I’ll be happy to share.

So good. So good.