
Perfecting Pie Crust
Last weekend was a rainy but perfect mother-daughter time. I mean what could be better than books, shopping and making PIE?! We spent an excessive amount of time in the delightful Vivienne Portland’s Culinary Bookstore (think cookbooks old and new, colorful linens and trays, consigned kitchenware, cute olive oils … oh my!) and went to a pie class! The focus of the class, taught by Chef Luca, was on pie skills and perfecting pie dough. I’ve always been intimidated making pie crust and get inconsistent results. But, upon taking his class and coming to the revelation (thanks to Luca) that my inner pie creativity will be unleashed once I master the art of pie pastry – I can’t stop dreaming about pie. I may even have spent all this morning going through Sister Pie and Pie Camp making a list of “pies to make.” Figure I can start practicing now and be a pro by Thanksgiving.
Before I get to the pie, let share that Portland Cookshop provided a warm and welcoming backdrop for the class. The homey smell of piecrust wafted through the brick-walled cookshop when we walked in. The class was divided into tables of four, and if I can say so, we got the fun table. Our partners in pie were a woman about my age and her son, who like my daughter had gifted the class to their mommas for Christmas. (Note: Both Vivienne and Portland Cookshop offer cooking classes.)

Here we are, my daughter and I, rolling pie dough with Chef Luca. He was great and I would recommend his classes. (A little blurry … must have been flour on my iPhone lens! Imagine that.)
The Ever-Intimidating Pie Crust
Besides the big takeaway of prepping butter and dry sets in advance, I learned how to correct several past mistakes. For me, it really helped to take the class and to see, hear and feel the pie dough vs. only reading about how to do it.
Mistake #1: Not working your butter in properly. Many recipes say the butter should be pea sized. But be wary of any big chunks or even small “balls” of butter. That’s when you get pockets or holes where the butter leaks out in the oven. Instead, make sure you rub your thumb against your fingers to work all the butter into flat disks or thin layers. This technique will make steam pockets and give you a flaky texture.
Mistake #2: Under or over hydration. This may be the trickiest part but practice can make perfect.
Too much liquid means the crust won’t be light and flaky. This is when you get a chewy or tough crust. Never dump in all the water a recipe calls for at once. Start with 2 tablespoons, followed by a tablespoon at a time. As you get closer to the right consistency, just sprinkle water in so you don’t overdo it. The dough is properly hydrated when it holds together when pressed against the side of the bowl. You don’t want it to be so wet that it sticks to your hands.
Too little liquid could mean your dough falls apart when you go to roll it out. You’ve probably heard don’t overwork your dough. However! A few kneads will ensure everything is evenly distributed. Luca recommends fluffing it with your hands or a bench scraper and pushing it up against the side of your bowl to test its readiness. Only when most of it comes together do you dump the dough onto your rolling surface and give it a handful of kneads to make sure there are no dry pockets and that your dough is evenly hydrated.
Mistake #3: Crummy crimping technique. I’ve had my share of uneven edges leading to a crust burnt on one side, or worse yet, you open the oven and part of your crust has fallen inward onto the filling. When you place the crust into the pie plate, let the sides drop in and push gently into the curve of pie plate. Don’t stretch it. And however you crimp the edges, you need to push into the lip of the pie plate so it adheres. It’s hard to explain and I need to practice this, but place thumb and forefinger of your non-dominant hand along the outside of the crust for desired width of crimp, and push with forefinger of your dominant hand into the edge of plate to adhere. Also, don’t trim your dough like your mother may have told you; just roll the excess under and onto the lip of the pie plate.
Mistake #4: Bad blind baking. You’ve filled your pie crust with beans or pie weights, but the edges still flip, or your crust slumps or shrinks. 😩 The secret? In addition to proper crimping, always bake your pie crust from a frozen state. Crumble up some parchment, line the shell and fill it with pie weights or dry beans. Bake on 375 for 20 minutes. Remove the weight. Brush the base with egg white to create a barrier (no one likes a soggy bottom), dock the crust and bake 10 minutes if you’re filling or 20 minutes for a fully baked shell.
Additional Tips
Always, always weigh your flour. One person’s cup is not the same as the next person’s. The variables in how you measure deliver inconsistent results. My kitchen scale was coincidentally the same one used in class.
Use food processor to pulse the frozen butter with dry ingredients. BUT – remove it and dump into a stainless-steel bowl before you start adding water! I’ve always put the water in the food processor, but this doesn’t give you the same control. You want to use your hands to mix the dough.
Use the quarter-turn technique when rolling out. Lightly flour your surface. Roll a few times and do a quarter turn. Repair any cracks at the beginning of your rolling. Keep turning so you know if it’s sticking to the counter. Add more flour as necessary.
The freezer is your friend. Not only should you start with frozen ingredients, you should also always bake your crust from frozen. Form your pie shells into pie plates in advance, cover well with plastic wrap and freeze. Then blind bake your frozen shell per above. If you are doing a two-crust filled pie – freeze the entire pie before baking.
Glass pie dishes are especially helpful for us non-pros. This way you can see how brown the bottom is getting.
You don’t need a pastry cutter, but a bench knife/bowl scraper comes in handy and keeps the dough off your fingers.
Let’s get to the pie!

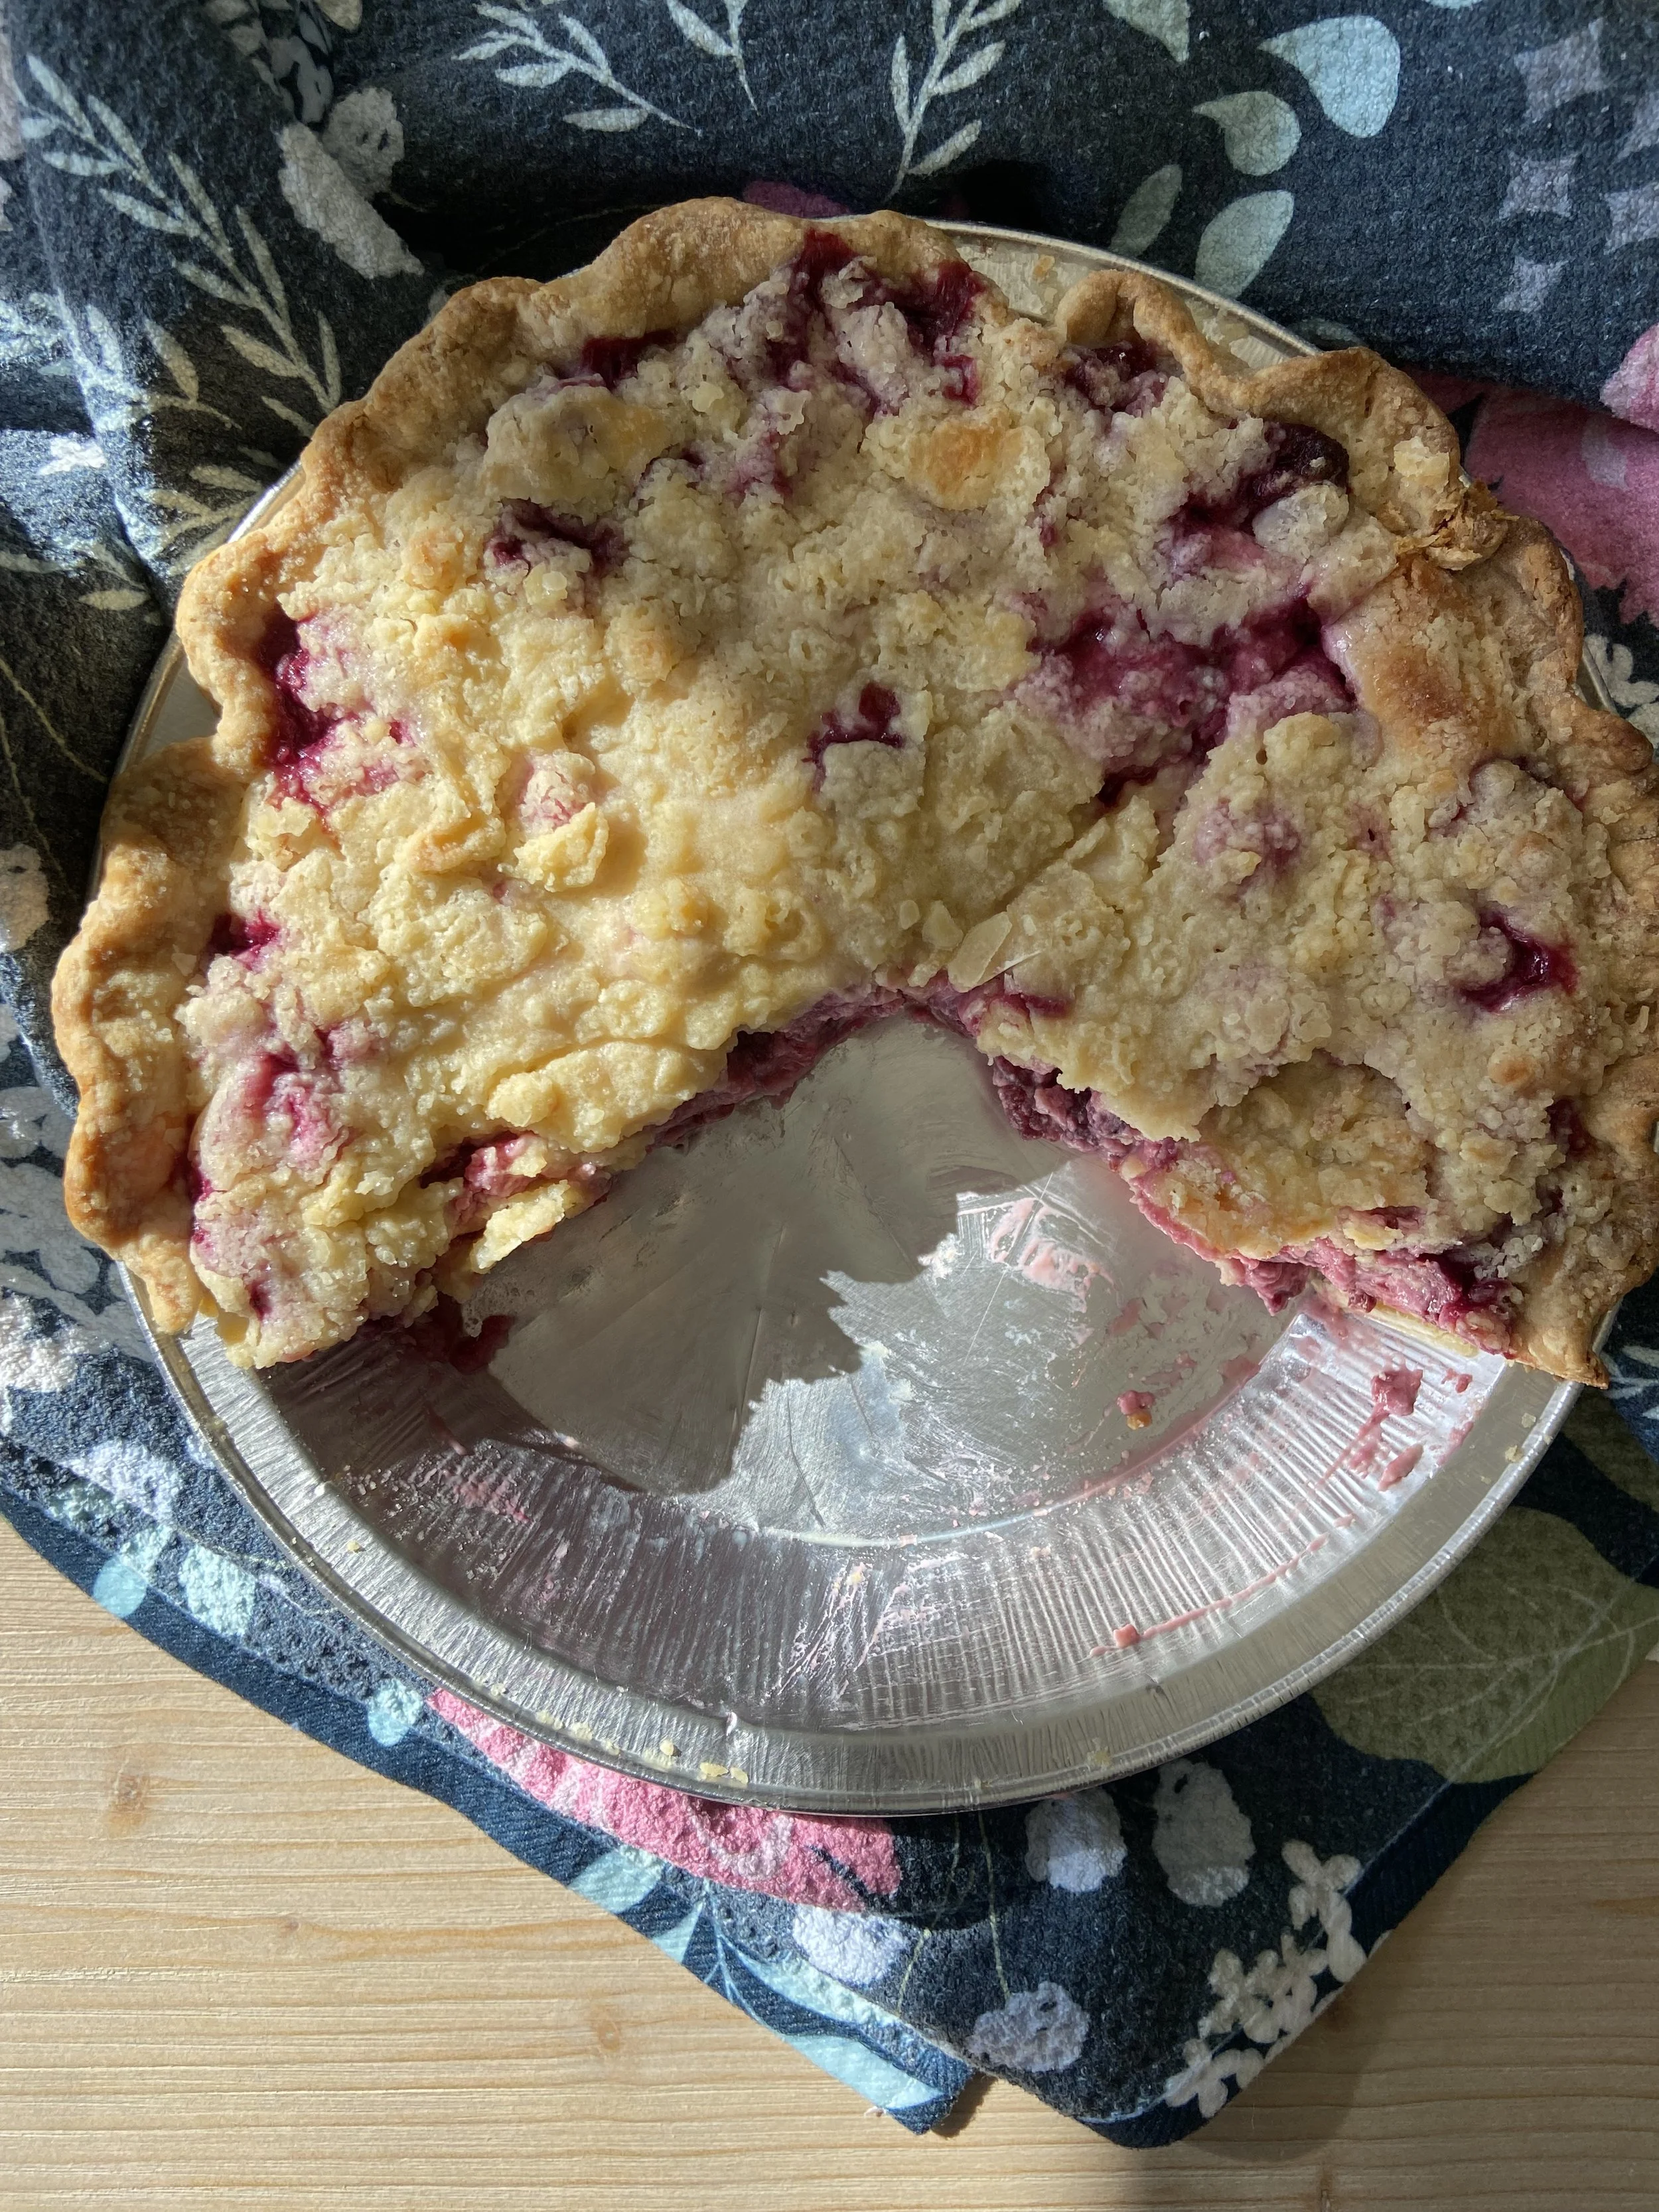
My Raspberry Sour Cream Pie … frozen berries and a sweetened sour cream filling and crumb topping. It tasted fabulous but you can see I still need to work on even crimping!
What I really liked about Chef Luca was his focus on technique. There are so many “here’s the secret to good pie crust” tidbits out there. But the main thing is technique and practicing that technique. You need to get used to the feel of the flour, working in the butter and hydrating your dough. And that all comes with practice.
If you’re making multiple pies, he recommends:
Day 1: Make your kits (butter, dry ingredients).
Day 2: Form and freeze your rounds and/or pie shells.
Day 3: Fill and bake your pies.
Prepping Butter and Dry Sets
In a dream world, we’d all have perfect pie crust rounds awaiting us in our freezers for guests, a birthday brunch or that hit-you-hard pie craving. This may have been my biggest aha moment when I got excited thinking that I could just casually surprise guests (oh this little thing? No bother!) with a homemade pie or breakfast quiche.
Well to do this, one must prep! Each set makes two rounds of dough. You can do this a couple hours in advance, but days are better! (Note that whatever pie crust recipe you use, you should freeze your ingredients ahead of time.)
Dry sets:
320 grams all-purpose flour
1 Tbs sugar
¼ tsp salt
It doesn’t matter which brand of AP flour or the exact protein content. The important thing is to get used to the feel of the flour you use. Flour reacts differently depending on the time of year, temperature, humidity, etc. I suggest practicing with the same flour so you know how it performs.
Butter sets:
227 grams European style (82% or higher butterfat)
This is where you want to splurge people. Butter does make a difference in flavor. Dice up your butter and wrap pile in parchment paper. Then freeze each set in Ziploc bag or container.
Plus the Liquid:
If you’re like me and you find yourself dodging the ice cubes in your bowl of water, there’s a better way! Have a pitcher of ice water ready, then pour it through a strainer into a bowl. Wow, never thought of that idea! When mixing the dough, Luca added 1 Tbs apple cider to each butter and dry set – for taste. Apple cider vinegar has been said to add flakiness, but there’s no scientific evidence of that. I also read, but haven’t tried, that you can freeze an inch of water and when ready to use, fill the container with cold water and apple cider vinegar.
Inside the pie
You probably want to know what kind of pie we made, don’t ya? Well, the focus of the class was on the crust, but as a group we made filling for two pies and got to sample them. Early info on the “Winter pie class” mentioned Chocolate Banana and Blood Orange Meringue Pie, which both sounded intriguing! However, we ended up making Salted Maple Pie with Swiss Meringue and Marionberry Sour Cream Pie. I don’t think any of these could have gone wrong, but that salted maple was to die for. Plus you get to use a blow torch. A full-sized blow torch, not one of those wimpy kitchen torches like I have! Proper blow torch is going on “the list.” (maybe a subsequent blog post ...)

A shot of her in all her raspberry glory.

From another angle.
She’s basking in the sun with the foothills behind my house reflected in the pie tin.
We left the class with a formed pie crust and a round of dough. Those babies drove with me over the snowy coastal range and into the freezer when I got home. I lasted three days before I had to have pie. I couldn’t find frozen marionberries, so used raspberries and made the berry sour cream pie. Chef Luca may have indicated that my crust was a little too hydrated! But I’m here to tell you it was still the flakiest pie crust I’ve ever made.
Now to become consistent. I’m thinking I will focus on making a few things consistently well vs. trying to make everything. So until a cake, a cookie … or maybe a meringue … distracts me, I’ll be making pie.